Open Source – Environment Operator

The day has finally come. Today we are announcing our open source project Environment Operator (EO).

Environment Operator is used throughout our project and has rapidly gained a name for itself as being well written and well thought out. Props go out to Simas Cepaitis, Cristian Radu and Ben Somogyi who have all contributed.

At its core, EO enables a seamless application deployment capability for a given environment/namespace within Kubernetes.

Benefits/Features:

  • multi-cluster deployments
  • audit trail
  • status
  • consistent definition of customer environments
  • separate build from deploy
  • minimizes risk and scope of impact
  • simple abstraction from Kubernetes
  • BYO CI/CD
  • empowers our customers (dev teams)
  • API interface
  • multiple forms of authentication
  • deploy through yaml config and API
  • written in Go
  • Docker Registries


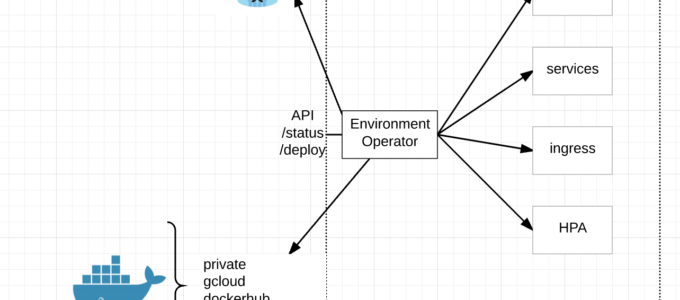
Multi-Cluster Deployments – With EO running in each namespace and exposed via an API, CI/CD pipelines can simply call the API endpoint regardless of Kubernetes cluster and deploy new services.


API Interface – EO has its own API endpoint for deployments, status, logs and the like. This combined with a yaml config for its environment is a very powerful combination.


Audit Trail – EO provides an audit trail of all changes to the environment through its logging to stdout.


Status – EO provides a /status endpoint by which to understand the status of an environment or individual services within the environment with /status/${service}


Separate Build from Deploy – What we found was, while our CI/CD pipeline is quite robust it lacked real-time feedback and audit capabilities needed by our dev teams. Separating our build from deploy allowed us to add in these additional features, simplify its use and enabled our dev teams to bring their own familiar pipelines to our project.


Minimize Risk and Scope of impact – Because EO runs inside the Kubernetes cluster we could limit its capabilities through Kubernetes service accounts to only its namespace. This limits risk and impact to other dev teams running in the same cluster as well as requiring a dev to call and entirely wrong API endpoint in order to effect another environment. Further more, authentication is setup for each EO, so separation of concerns between environments can easily be made.


Simple Abstraction – Because EO is so simple to use, it has enabled our teams to get up and running much faster in Kubernetes. Very little prior knowledge is required, they can use their same pipelines by using a common DSL in our Jenkins plugin and get all the real-time information all from one place per environment.


BYO CI/CD – I think this is pretty self-explanatory but we have many dev teams at Pearson that already have their own CI/CD pipelines. They can continue using their pipeline or choose to use ours.


Empower our Dev teams – Ultimately EO is about empowering Dev teams to manage their own environments without requiring tons of prior knowledge to get started. Simply deploy EO and go.


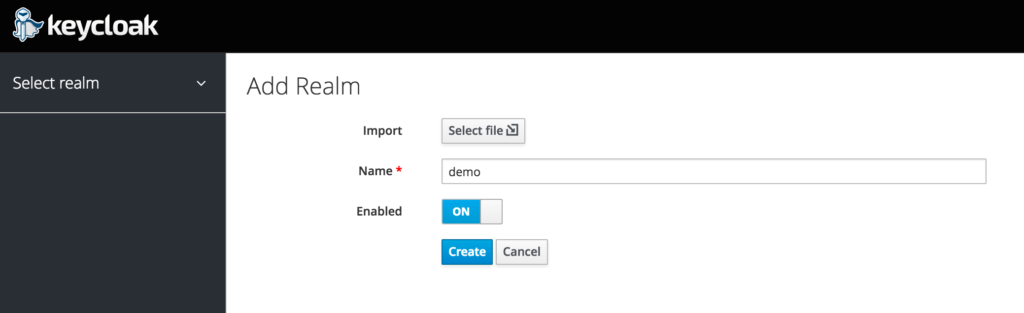
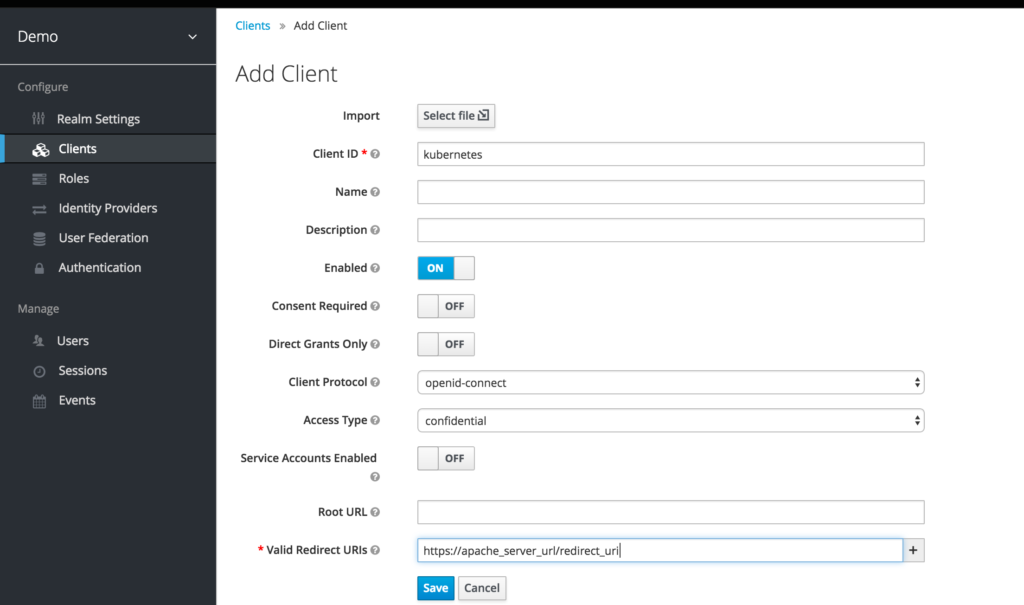
Authentication – EO currently supports two different kinds of authentication. Token based which gets pulled from a Kubernetes secret or OAuth. We currently tie directly into Keycloak for auth.


Plugin (DSL) for Jenkins – Because most of our Dev teams run Jenkins, we wrote a plugin to hook directly into it. Other plugins could very easily be written.


Docker Registries – EO can connect to private, public, gcloud and docker hub registries.


As you can see, Environment Operator has a fair amount of capabilities built-in but we aren’t stopping there.

Near term objectives:

  • Stateful sets
  • Kubernetes Jobs
  • Prometheus


Github:

https://github.com/pearsontechnology/environment-operator

https://github.com/pearsontechnology/environment-operator-jenkins-plugin


Let us know what you think!

@devoperandi


Kubernetes Authentication – OpenID Connect

Authentication is often that last thing you decide to implement right before you go to production and you realize the security audit is going to block your staging or more likely production deploy. Its that thing that everyone recognizes as extremely important yet never manages to factor into the prototype/poc. Its the piece of the pie that could literally break a entire project with a single security incident but we somehow manage to accept Basic Authentication as ‘good enough’.

Now I’m not going to tell you I’m any different. In fact, its quite the opposite. What’s worse is I’ve got little to no excuse. I worked at Ping Identity for crying out loud. After as many incidents as I’ve heard of happening without good security, you would think I’d learn my lesson by now. But no, I put it off for quite some time in Kubernetes, accepting Basic Authentication to secure our future. That is, until now.

Caveat: There is a fair amount of complexity so if you find I’ve missed something important. PLEASE let me know in the comments so others can benefit.


Currently there are 4 Authentication methods that can be used in Kubernetes. Notice I did NOT say Authorization methods. Here is a very quick summary.

  • Client Certificate Authentication – Fairly static even though multiple certificate authorities can be used. This would require a new client cert to be generated per user.
  • Token File Authentication – Static in nature. Tokens all stored in a file on the host. No TTL. List of Tokens can only be changed by modifying the file and restarting the api server.
  • Basic Authentication – Need I say more? very similar to htpasswd.
  • OpenID Connect Authentication – The only solution with the possibility of being SSO based and allowing for dynamic user management.

Authentication within Kubernetes is still very much in its infancy and there is a ton to do in this space but with OpenID Connect, we can create an acceptable solution with other OpenSource tools.

One of those solutions is a combination of mod_auth_openidc and Keycloak.

mod_auth_openidc – an authentication/authorization module for Apache 2.x created by Ping Identity.

Keycloak – Integrated SSO and IDM for browser apps and RESTful web services.

Now to be clear, if you were to be running OpenShift (RedHat’s spin on Kubernetes), this process would be a bit simpler as Keycloak was recently acquired by Red Hat and they have placed a lot of effort into integrating the two.


The remainder of this blog assumes no OpenShift is in play and we are running vanilla Kubernetes 1.2.2+

The high level-

Apache server

  1. mod_auth_openidc installed on apache server from here
  2. mod_proxy loaded
  3. mod_ssl loaded
  4. ‘USE_X_FORWARDED_HOST = True’ is added to /usr/lib/python2.7/site-packages/cloudinit/settings.py if using Python 2.7ish

Kubernetes API server

  1. configure Kubernetes for OpenID Connect

Keycloak

  1. Setup really basic realm for Kubernetes


KeyCloak Configuration:

This walk-through assumes you have a Keycloak server created already.

For information on deploying a Keycloak server, their documentation can be found here.

First lets add a realm called “Demo”

Screen Shot 2016-06-10 at 5.51.41 PM

Now lets create a Client “Kubernetes”

Screen Shot 2016-06-10 at 5.52.49 PM

Screen Shot 2016-06-10 at 5.54.20 PM

Notice in the image above the “Valid Redirect URIs” must be the

Apache_domain_URL + /redirect_uri

provided you are using my templates or the docker image I’ve created.


Now within the Kubernetes Client lets create a role called “user”

Screen Shot 2016-06-10 at 5.58.32 PM


And finally for testing, lets create a user in Keycloak.

Screen Shot 2016-06-10 at 6.00.19 PM

Notice how I have set the email when creating the user.

This is because I’ve set email in the oidc user claim in Kubernetes

- --oidc-username-claim=email

AND the following in the Apache server.

OIDCRemoteUserClaim email
OIDCScope "openid email"

If you should choose to allow users to register with Keycloak I highly recommend you make email *required* if using this blog as a resource.


Apache Configuration:

First lets configure our Apache server or better yet just spin up a docker container.

To spin up a separate server do the following:

  1. mod_auth_openidc installed on apache server from here
  2. mod_proxy loaded
  3. mod_ssl loaded
  4. ‘USE_X_FORWARDED_HOST = True’ is added to /usr/lib/python2.7/site-packages/cloudinit/settings.py if using Python 2.7ish
  5. Configure auth_openidc.conf and place it at /etc/httpd/conf.d/auth_openidc.conf in on centos.
    1. Reference the Readme here for config values.

To spin up a container:

Run a docker container with environment variables set. This Readme briefly explains each environment var. And the following template can be copied from here.

<VirtualHost _default_:443>
   SSLEngine on
   SSLProxyEngine on
   SSLProxyVerify ${SSLPROXYVERIFY}
   SSLProxyCheckPeerCN ${SSLPROXYCHECKPEERCN}
   SSLProxyCheckPeerName ${SSLPROXYCHECKPEERNAME}
   SSLProxyCheckPeerExpire ${SSLPROXYCHECKPEEREXPIRE}
   SSLProxyMachineCertificateFile ${SSLPROXYMACHINECERT}
   SSLCertificateFile ${SSLCERT}
   SSLCertificateKeyFile ${SSLKEY}

  OIDCProviderMetadataURL ${OIDCPROVIDERMETADATAURL}

  OIDCClientID ${OIDCCLIENTID}
  OIDCClientSecret ${OIDCCLIENTSECRET}

  OIDCCryptoPassphrase ${OIDCCRYPTOPASSPHRASE}
  OIDCScrubRequestHeaders ${OIDCSCRUBREQUESTHEADERS}
  OIDCRemoteUserClaim email
  OIDCScope "openid email"

  OIDCRedirectURI https://${REDIRECTDOMAIN}/redirect_uri

  ServerName ${SERVERNAME}
  ProxyPass / https://${SERVERNAME}/

  <Location "/">
    AuthType openid-connect
    #Require claim sub:email
    Require valid-user
    RequestHeader set Authorization "Bearer %{HTTP_OIDC_ACCESS_TOKEN}e" env=HTTP_OIDC_ACCESS_TOKEN
    LogLevel debug
  </Location>

</VirtualHost>

Feel free to use the openidc.yaml as a starting point if deploying in Kubernetes.


Kubernetes API Server:

kube-apiserver.yaml

    - --oidc-issuer-url=https://keycloak_domain/auth/realms/demo
    - --oidc-client-id=kubernetes
    - --oidc-ca-file=/path/to/ca.pem
    - --oidc-username-claim=email

oidc-issuer-url

  • substitute keycloak_domain for the ip or domain to your keycloak server
  • substitute ‘demo’ for the keycloak realm you setup

oidc-client-id

  • same client id as is set in Apache

oidc-ca

  • this is a shared ca between kubernetes and keycloak


OK so congrats. You should now be able to hit the Kubernetes Swagger UI with Keycloak/OpenID Connect authentication

Screen Shot 2016-06-10 at 6.08.47 PM

And you might be thinking to yourself about now, why the hell would I authenticate to Kubernetes through a web console?

Well remember how the kube-proxy can proxy requests through the Kubernetes API endpoint to various UIs like say Kube-UI. Tada. Now you can secure them properly.

Today all we have done is build authentication. Albeit pretty cool cause we have gotten ourselves out of statically managed Tokens, Certs or Basic Auth. But we haven’t factored in Authorization. In a future post, we’ll look at authorization and how to do it dynamically through webhooks.